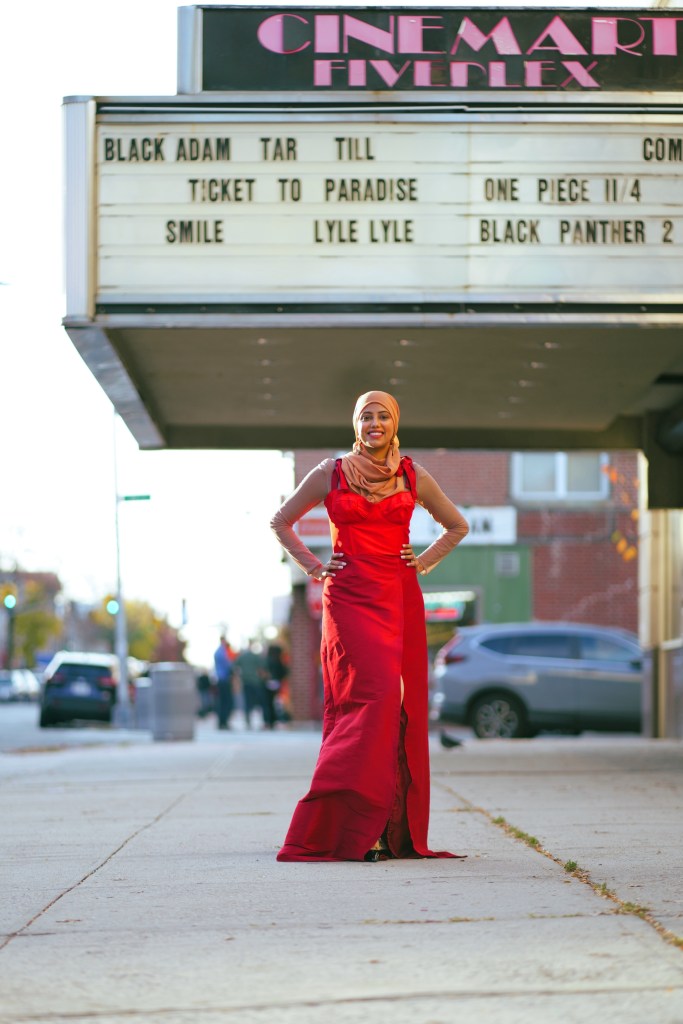
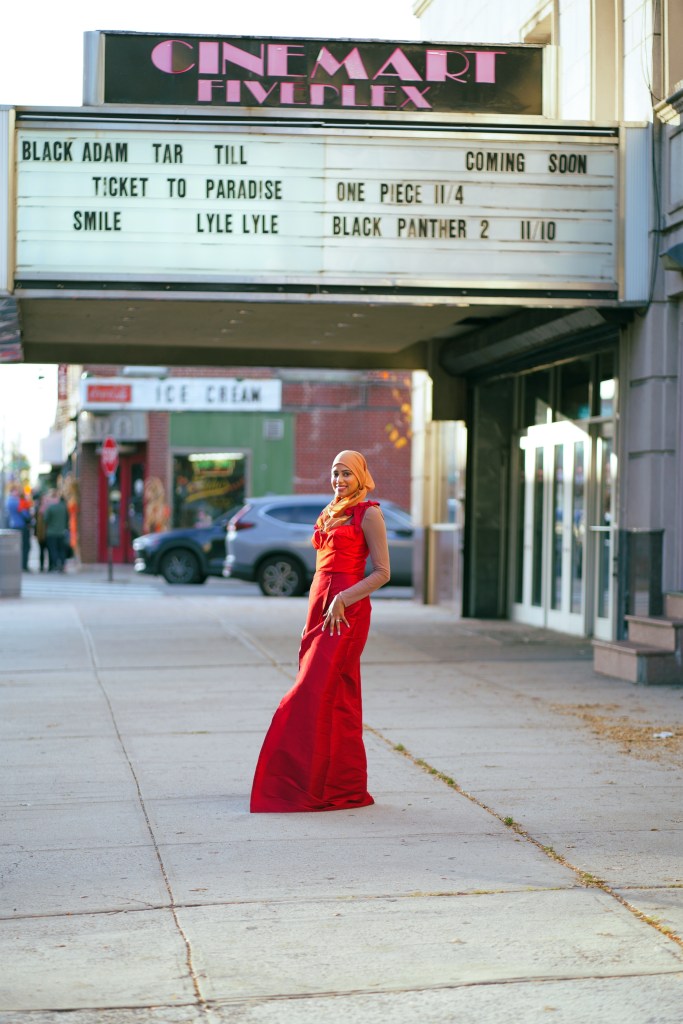
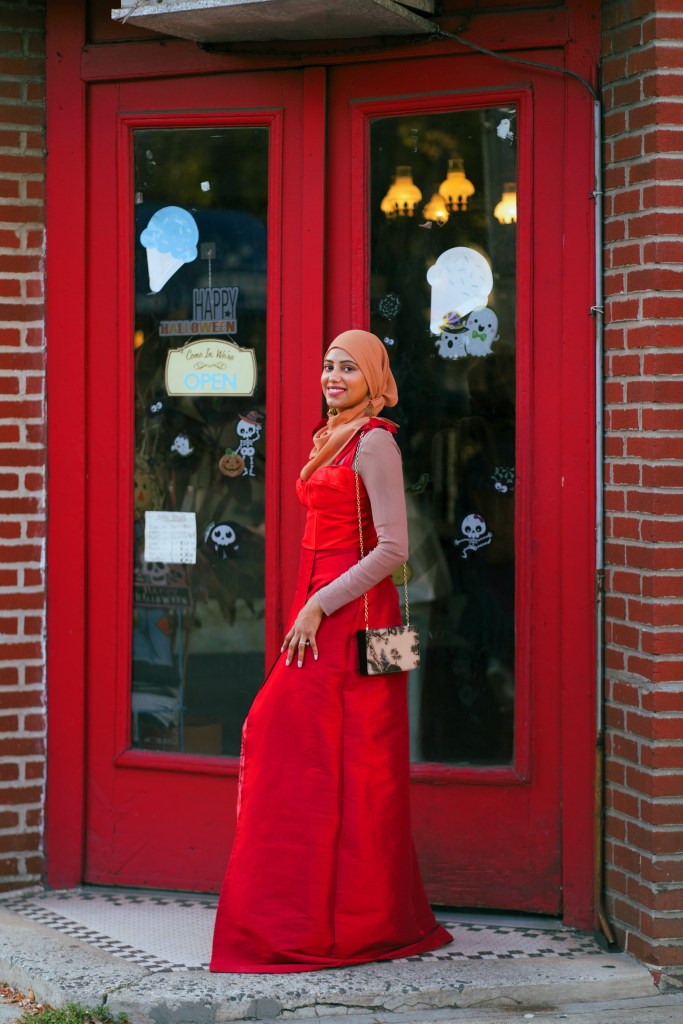
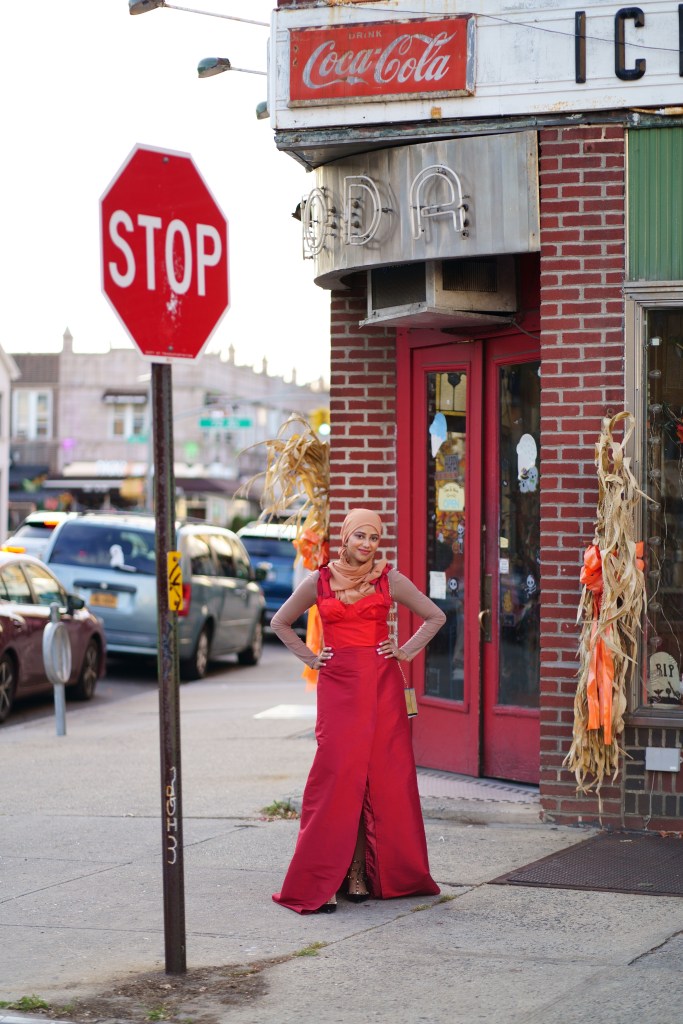
Hey friends! I’m so excited to share the Red Bustier Gown. It was three months to make, three months to take photos in, and three months until I posted the look!

The inspo of this style is from the 2022 Met Gala theme “The Gilded Age.” The museum featured an exhibit titled “Icons in American Fashion.” I never thought I would say this, but it seems Kim Kardashian and I had a similar thought upon hearing Icons in American fashion: Marilyn Monroe! Marilyn Monroe is an icon in fashion. So many of her looks are cemented in fashion imagery.
I wanted to recreate the vibe of “Diamonds Are a Girl’s Best Friend.”
Fabric
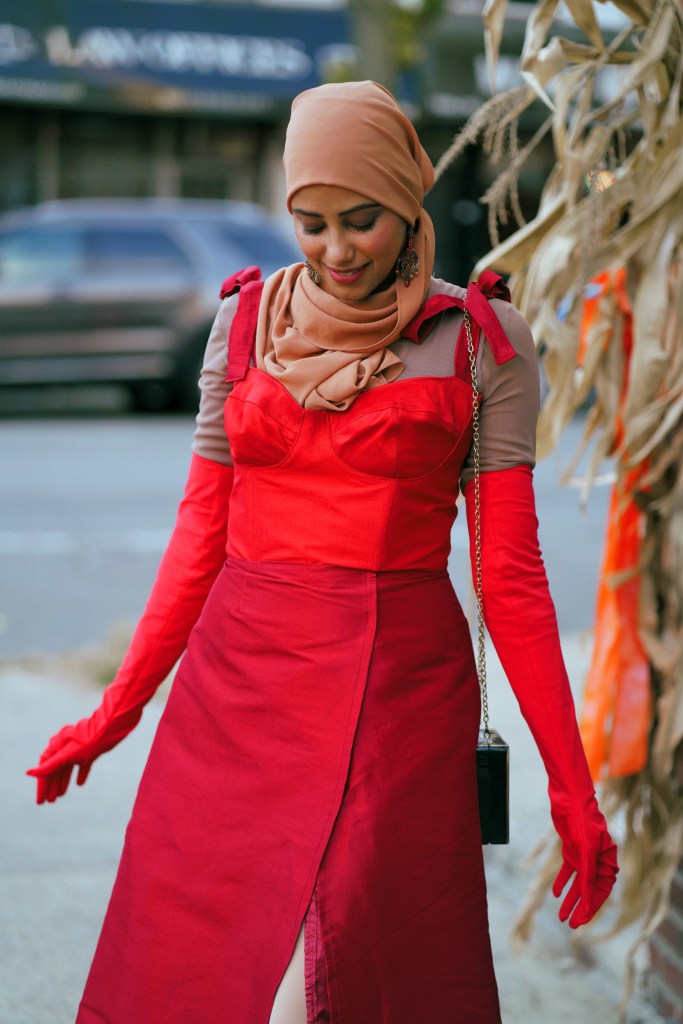
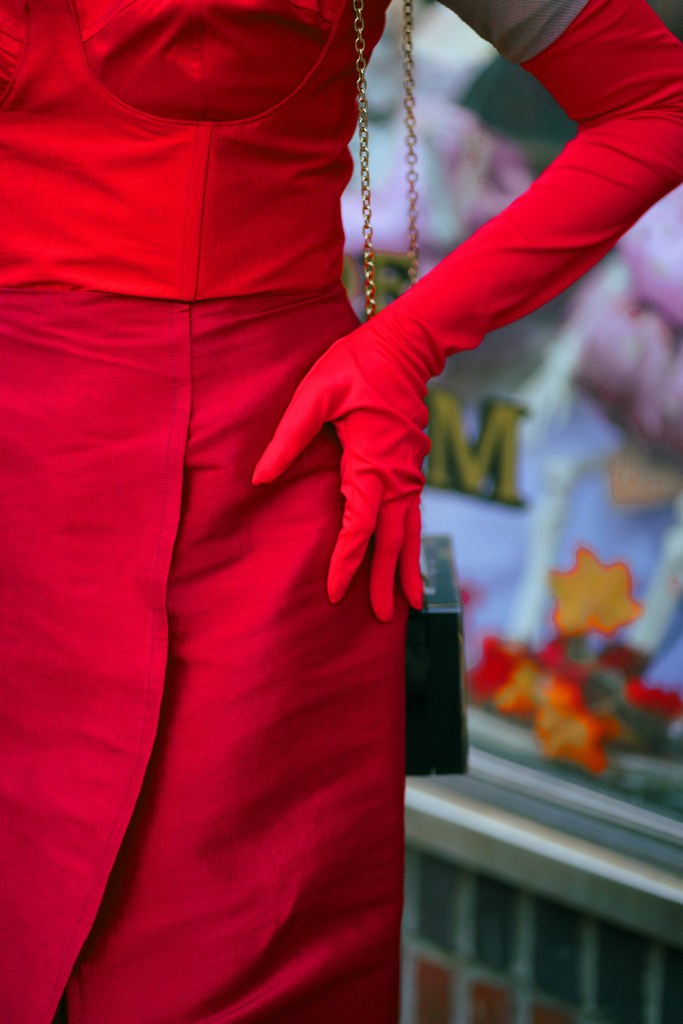
A local designer I worked with gave me a yard of the cherry red shantung fabric. With the Met Gala theme on my mind, I dreamed of a gown. I purchased a darker red shantung for the skirt and straps.
Pattern
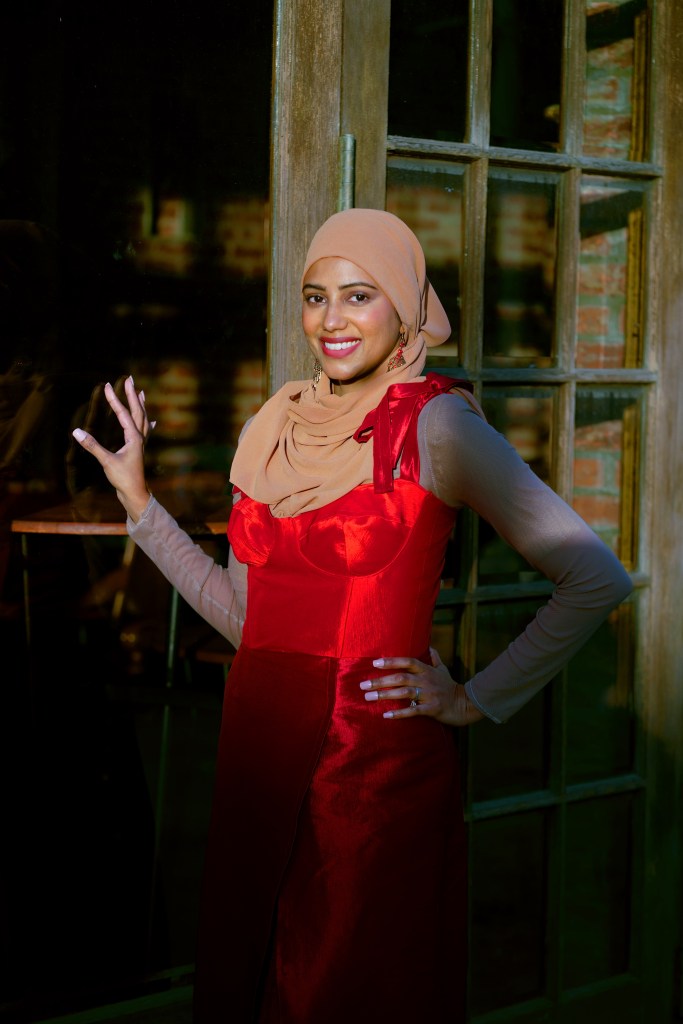
The sewing pattern for this look is the Rose Café Bustier Dress. This is my first time making the full dress version, but of course I hacked it!
It’s a wonderfully solid pattern and more of an intermediate to advanced sewing level pattern. I consider myself a beginner-intermediate (ha) and I had to consult the instructions through every step.
This was my second time making the bustier pattern, and I made a third in September.
With now three makes of this pattern, I have several thoughts on the fit etc I’ll share below.
Achieving the Perfect Fit in the Rose Café Bustier Pattern
I cut my regular dress size and bra cup size. Since making my third version (a Blue Cinderella gown I haven’t posted on the blog yet), I understand a few fit errors in my first two versions.
My first make of the Rose Cafe Bustier I tried a couple different sizes to see what the best fit would be. It was pretty much my regular bra size (although still slightly loose).
I’ve seen quite a few comments in later 2021 when I made my first version that mention the cups gape and are loose even after fitting to your size. So it’s a common issue when sewing this pattern. I think this happens because it comes down to your unique bust shape.
There are three main changes that help with the cup gaping issue:
1. Adding a center seam
2. Reducing the width of the cup upper piece
3. Removing seam allowance around the perimeter of the cups (after sewn with your regular size).
Do these changes mean you need to cut a different cup size in the Rose Cafe Bustier pattern? Yes and no. I’m not an expert, this is my personal observation. I haven’t consulted Daria or any fitting experts, only my personal knowledge of sewing and style.
I compared the Rose Café pattern to my other bustiers in my regular size, (for example from Victoria’s Secret) and I find the Rose Café is larger overall in the cups, upper cup piece, with a more outward curve (pointy). The Rose Café Bustier is made for a specific fabric and style.
Like most clothes and patterns, they do tend to need adjustments for our unique shapes.
It doesn’t mean the pattern or clothing isn’t good. So it’s not unusual, but a note to keep in mind that if it’s your first time sewing this pattern, you will have to set aside time for fittings!
I sewed a size smaller than my regular cup size in my first toile (using the bra sister sizing method) and then found them too small. IMO it’s easier to make a pattern smaller!
I will definitely test out other sizing options for my next version, because clearly my body has changed since fit testing my first version!
On my Rose Café Bustier make after this Red Gown, the fit was perfect by implementing these three changes detailed below:
1. Adding a Center Seam: I found that a center front seam greatly improved the fit and resolved cup gaping. Daria has a strapless bustier pattern with the center front seam that I used for my 3rd make. I’ve chatted over the center front seam suggestion with others, and it does seem to resolve the gaping issue!
2. Reducing the Width of the Upper Cup Piece: Some women have a full upper bust or under bust (or neither). This pattern favors a fuller upper bust and a more rounded bust. Three kids later let’s just say…a full upper bust is not me! Reducing the width of the upper cup piece helped with cup gaping issues. I did that on all three versions.
3. Removing Seam Allowance: On the two versions that I didn’t add a center front seam, I found myself reducing the cup seam allowance closest to the center front.
The fourth extra note is that I did not use padding for any version. That could help the fit especially if you need the fullness. The underwire channeling will also give needed support to help the cups sit correctly.
I wish I did those two things for this gown! The shantung doesn’t have enough structure (even interfaced and lined) to keep the shape required. Adding foam to the cups will give a very nice shape.
For MORE references on sewing and fit of the Rose Café Bustier, Gracie over at Sew Like Honey has a fantastic blog post with so many notes from other sewists!
Rose Cafe Bustier Dress Assembly
The construction is what makes this intermediate-advanced! I need both written and visual instructions. After sewing the third time, I’m faster at understanding the order. I’m guilty of wanting a to barrel through and read a list summary. If you like that too, here’s the list I made that helped me move much faster the 3rd time!
1. Sew the bodice back and front seams. If you’re attaching boning do so after interfacing and sewing the seams. Topstitch!
2. Sew the skirt darts. For the wrap skirt I made here, please see the note below!
3. Sew the lining bodice and skirt

4. Attach the back straps. I thought the straps go last, but they do not! They are sewn in between the back bodice and it’s lining. The front straps are attached last because it’s sewn to the cup and it’s lining, and the cups are the very last part to be attached!
5. Sew the center back invisible zipper
6. Attach the lining to the main dress. The dress is now lined with the zipper in, but no cups!

7. Sew in the cups!
Sewing Tips
I labeled every single pattern piece with a fabric pen with the corresponding letter or name. This helped immensely because my fabric doesn’t have an obvious right and wrong side. It also helps because the cup pieces look so similar.

The most tricky part for me is sewing the cups and sewing the cups to the bodice. It requires precision! Baste it first as the instructions suggest.
To make the wrap skirt, start with the Rose Café skirt pattern and extend the center front about 6”-8” inches. I recommend extending to cover the dart on the skirt. I freehanded an A line shape.
Styling
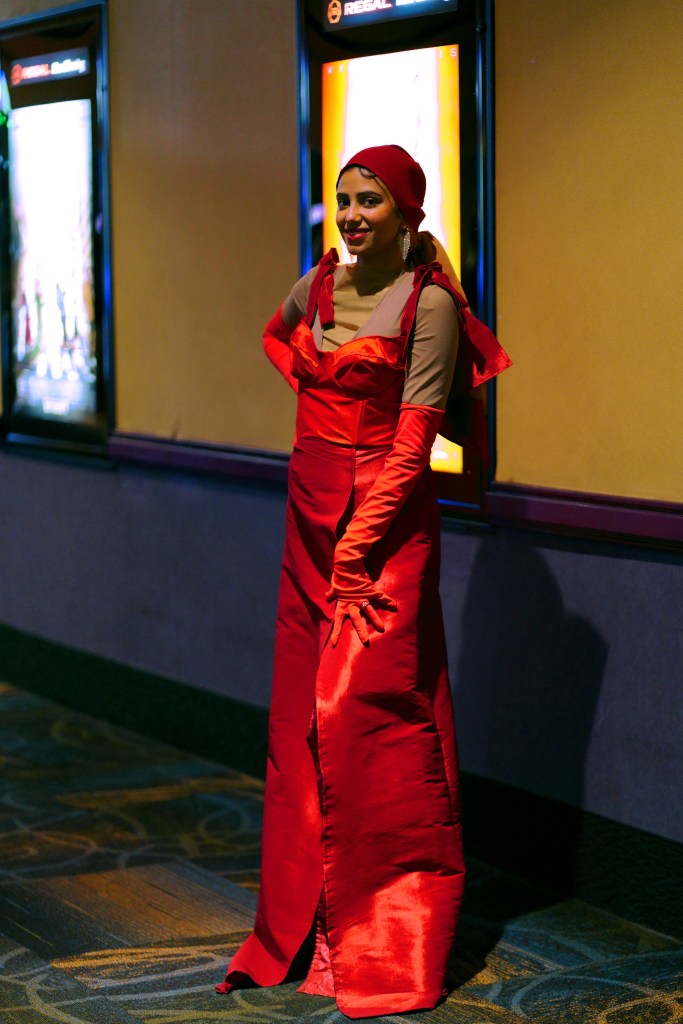
The styling was chosen by Instagram Story friends! I have two options: Vintage or Glam. Story friends voted for vintage!
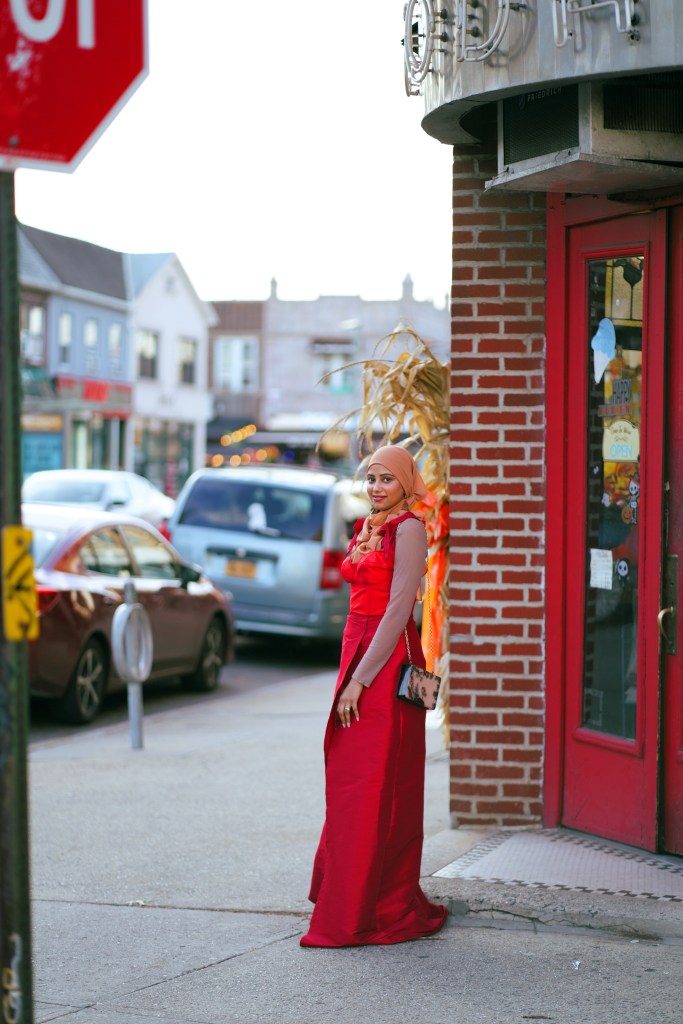
Glam was more sparkly, and I planned to wear a matching red scarf. I added in the red scarf (made from the dress) for the evening style.
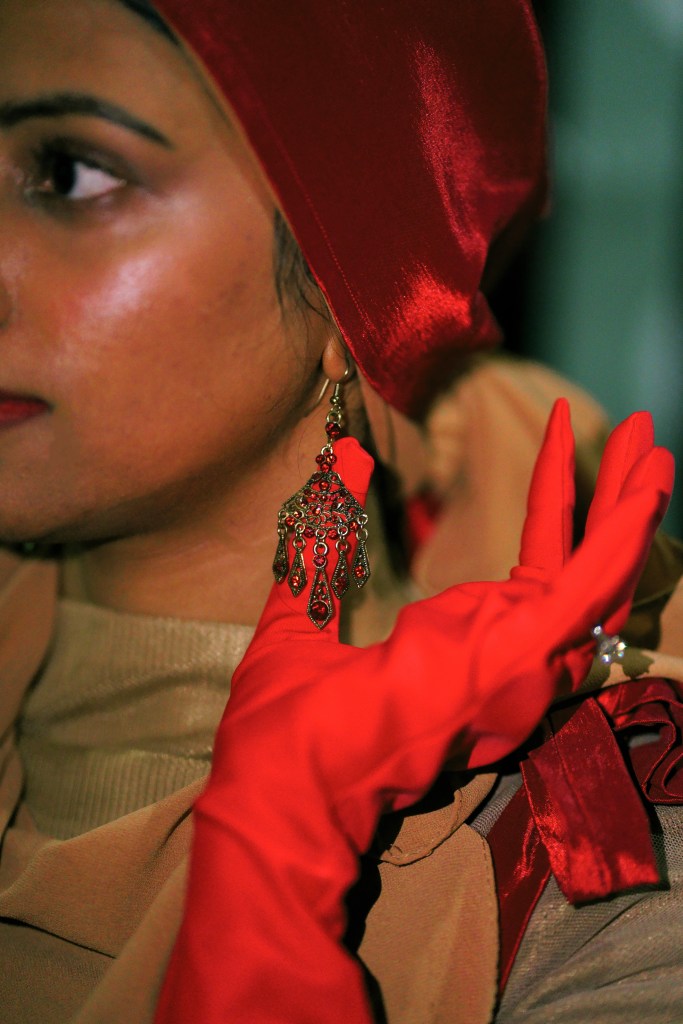
I was so excited to sew gloves for the first time. I purchased this pattern on Etsy. I made it out of red ITY jersey. Another win for Story poll friends!

-Ammara
Follow me on instagram @ammaraza.sews
Thanks for reading! Would you make a red bustier gown too?
All photos @weddingsandting

